Managing User Permissions
Overview
A manager user profile will be able to create, edit and delete users from the Settings > Users tab.
User profiles
See a description of each User Profile available in the table below. When creating and managing users you are able to select and manage these profiles.
| User Profile | Description | Who for? |
|---|---|---|
| Developer | Able to access the Settings tab. | This profile is used for developers who need to configure API settings, such as customisation of your Hosted Checkout and configuring Payment Methods. |
| Executive Manager | Complete access to the Hub (excluding the Settings tab). | This is essentially a 'Super User' profile. |
| Finance | Able to access and export data from the transactions, financials and Accounts tabs. Also able to access the Virtual Terminal and Payment Links feature. | This profile is used for individuals who need access to the financial reporting to help them reconcile incoming funds from the Acquirers. |
| Finance Manager | Finance user with extended permissions. As well as the finance permissions, they can create beneficiaries, process payouts and bulk upload files manually within the Accounts section. | For senior users within the finance function. |
| Fraud | Able to access the Transactions and Frauds tabs. Also able to access the blocklist feature to prevent potentially fraudulent transactions from being processed. | This profile is used for individuals who focus on transaction monitoring, reviewing the incoming fraud and dispute data. |
| Manager | Complete access to the Hub, including the Settings tab. | This is an admin user with full permissions. |
| Sales | Access the Virtual Terminal feature only, with visibility of the Dashboard. | This profile is used for individuals who are required to take payments and create payment links. |
| Sales Lite | Able to access both the Virtual Terminal and Payment Links feature. | Similar to the Sales user, but with the reduced access to the Dashboard, meaning the overall sales volumes are hidden from view. |
| Read-Only | Read-only access to the Transactions, Financials, Frauds and Requests tab. | This profile is used for individuals who can access the reporting, but cannot make any amendments such as refunds or voids. |
| User | Access to the Transactions, Financials, Frauds and Requests tab and able to to manually void and refund transactions from within the Hub. | This profile is used for individuals that require full access to the Hub, but not at an administrative level. |
Create a user
- Navigate to the Settings menu and open the Users tab.
- Select + Add User.
- Populate the First Name, Last Name, Email and Phone Number fields.
- Ensure that the Active tickbox is selected.
- Select the relevant User Profile from the list.
- Submit the process by selecting + Add User. The created User will then be visible from within the Users list.
Managing users
All current users will be displayed in a list, indexed by most recently created appearing first. Manager profiles can locate an existing user by entering the email address in the search bar. There is also the option to export the list of user's by hitting the Export option on the right-hand side.
From the User's tab you can view:
| Field | Description |
|---|---|
| User ID | Unique ID assigned by Acquired.com when the user was created. |
| Merchant | Merchant that the user is associated to. |
| Name | The user's first and last name. |
| The user's email address. | |
| Telephone | The user's phone number. |
| Role | The user profile that has been assigned. |
| Last Login | Detail of when the the user last logged in. If the user has not yet logged in within the given timeframe it will be set to Invited. If the user has never logged in and it is now outside of the timeframe, it will be set to Expired. |
| Active | This will be set if the Active tickbox was selected when the user was created/edited. |
Update a user
To update an existing user follow these steps:
- Locate the user from the list.
- Click on the ellipsis in the Action menu and select Update User.
- Update any of the required fields and save. The user profile will then be updated.
Delete a user
To delete an existing user follow these steps:
- Locate the user from the list.
- Click on the ellipsis in the Action menu and select Delete User.
- When the prompt opens, simply confirm your action by clicking Delete User again and the profile will be removed.
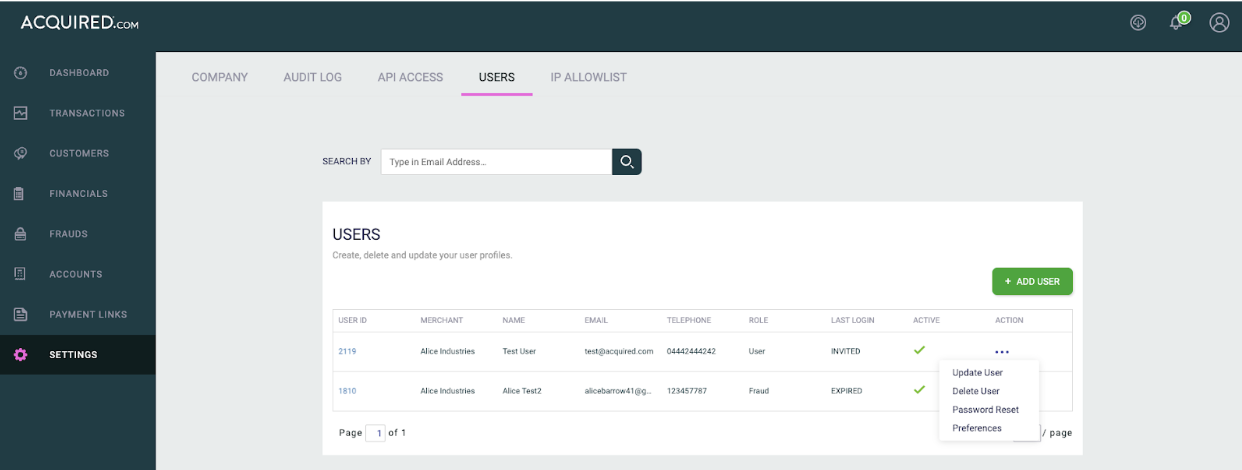
Other actions
There is also other actions that a manager profile can complete within the Action menu.
Password reset
To send a password reset email link to the Hub user, simply click on Password Reset in the Action menu and confirm the action. Once the action is completed a note will be displayed to confirm that a password reset email has been sent.
User preferences
This feature allows you to update notification preferences relating to our Banking Services. Email notifications will be sent for the following reasons:
- Balance Warning - Sent when the balance has reached your pre-configured warning amount.
- Daily Summary - The Daily Summary Files include a record of all activity made against a ledger for the previous day.
- Payment Rejection - These notifications are sent when a payment has been rejected.
Updated about 1 month ago