WooCommerce
Learn how to download and set up the WooCommerce extension.
Get started
Acquired.com's WooCommerce plugin is designed for everyone, focusing on accessibility, performance, security, and ease of use. Our plugin ensures smooth navigation, swift transactions, secure data handling, and intuitive functionality.
Click here to get started with your WooCommerce integration.
Set up WooCommerce
Thank you for downloading the Acquired.com for WooCommerce extension. To get started you will first need access to our test environment so you can complete the required configuration steps to start accepting payments. If you don’t already have one, click here.
Once the test account has been created, you will receive an email containing the required information to configure the extension as well as how to access our back office Hub where you can view transactions, customise the payment form and set up different payment methods.
System requirements
Your store must be running on Wordpress 5.7.2 & PHP 7.4 or higher.
Installation
We recommend that you install the extension from the Wordpress marketplace by following these steps:
- Login to the Wordpress admin panel: https://yourdomain.com/wp-admin or https://yourdomain.com/account
- From the sidebar, navigate to Plugins > Add New.
- In the search bar, top right corner, enter Acquired.com.
- Click on Install Now.
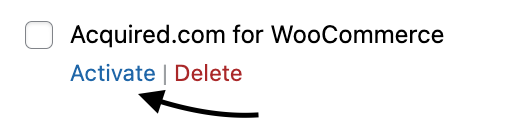
- Once the installation process is completed, click Activate.
Configuration
Once the installation process is complete, from the Wordpress sidebar:
- Navigate to WooCommerce > Settings.
- Select Payments.
- Select Acquired.com for WooCommerce.
- There will be 4 tabs to navigate through and configure:
- General
- Card payments
- Apple Pay
- Google Pay

General: configuration
Field | Description | Required |
|---|---|---|
Enable Staging Mode | We strongly recommend you start processing in the test mode - this will allow you to confirm the plugin is working correctly before accepting production traffic. When you are ready to go live - contact our support team. | Yes |
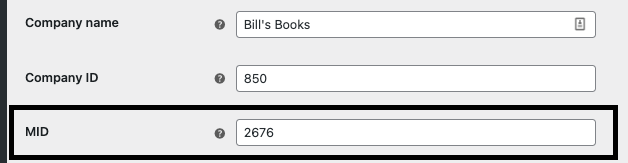
Company Name | The value set here will be displayed to the customer on the Google Pay payment sheet - set it to your business name. | Yes |
Company ID | Enter the 3/4 digit Company ID from your welcome email. | Yes |
MID | Enter the 4/5 digit MID value in this field. (View theFinding your MID section for further information.) | Yes |
Hashcode | Enter your company hashcode. | |
Password | Enter your company password. | |
Set Order Status To | Confirm the status of the transaction (see detail below). | Yes |
Dynamic Descriptor | The value to appear as a reference on the customer’s bank statement. | yes |
Debug Mode | When enabled, a debug log will be created for each request to the API. We recommend setting this to "enable". |
Set Order Status To:
- Processing: when a transaction is successfully processed, there is no further action required and the funds will arrive in your account.
- On Hold: when a transaction is successfully processed, you will be required to login to the Wordpress admin panel and update the status before the funds will arrive in your account.
Card payments: configuration
Field | Description | Required |
|---|---|---|
Enable Card Payments | When enabled, it allows you to process card payments through the Acquired.com payment gateway. | Optional |
Checkout Title | Define what is displayed to the user on the Checkout page of your store - for example, “Pay by Card”. | Yes |
Description | Define what is displayed to the user on the Checkout page upon selecting this payment method. For example, “you will be asked to securely enter your card details on the next page after selecting Place Order”. | No |
Display Payment Form | There are 3 ways you can display the payment form to the cardholder (see detail below):
| Yes |
Template ID | Follow the steps in styling the payment form to set the 4 digit value in this field. | No |
Display Payment Form methods:
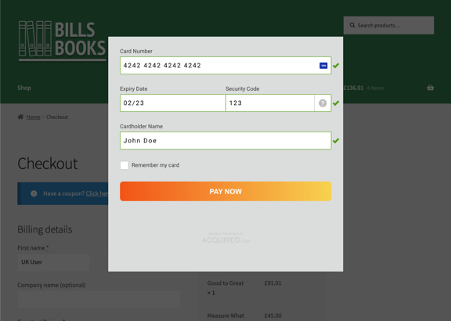
- i-Frame Popup: after selecting Pay by Card and hitting the Place Order button, a modal containing the payment page will be displayed to the user to complete the payment.
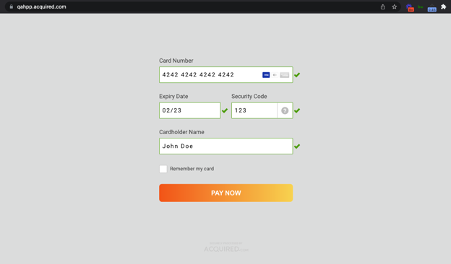
- Redirect: after selecting Pay by Card and hitting the Place Order button the cardholder will be fully redirected to our environment to enter their card details.
EMV 3-D Secure: configuration
| Field | Description | Required |
|---|---|---|
| Enabled | The use of EMV 3-D Secure is mandated in the UK & Europe - we strongly recommend you set this option to 3DS to remain compliant and to authenticate cardholders. | Yes |
| Contact us | As part of the EMV 3DS authentication process, you are required to provide a link to your 'contact us' page. | Yes |
Saved cards: configuration
These settings need to be configured if you choose to allow customers to use previously used cards.
| Field | Description | Required |
|---|---|---|
| Save Cards | When enabled, cardholders will be able to pay using previously stored cards at checkout when selecting to Pay by Card. | Optional |
| Saved Cards Template ID | You can choose to style the payment form differently when the customer is using a previously stored card. If you do not set a value, we will use the template_id configured. | Optional |
| Debug Mode | When enabled, a debug log will be created for each request to the API. | Optional |
Apple Pay: configuration
Alongside the configuration below, you will need to login to the Acquired.com Hub in order to complete the Apple Pay setup. (See our Apple Pay guide here).
Field | Description | Required |
|---|---|---|
Enable Apple Pay | When enabled, customers will be able to complete payment via Apple Pay. | Optional |
Payment Sections | Where to display the Apple Pay button (see detail below):
| Optional |
Button Colour | There are 3 options for how you can display the Apple Pay button to your users depending on the colour scheme you have chosen for your website. | Optional |
Button Type | Depending on the nature of your business, you may want to change the text that is displayed on the Apple Pay button displayed to the user. | Optional |
Button Height | Set the height in pixels of the Apple Pay button - the width will always be set to 100%. | Optional |
Debug Mode | When enabled, a debug log will be created for each request to the API. | Optional |
Depending on how you have built your checkout flow within WooCommerce there are 3 places you can display the Apple Pay button:
- Product: will be displayed below the Add to Cart button.
- Cart: will be displayed below the Proceed to Checkout button.
- Checkout: will be displayed as a payment option along with Pay by Card.
You can choose to support all or just some of the above options depending on your preference.
NoteIf your business processes competitions, please ensure that you only present the Apple Pay button within the Checkout page.
Google Pay: configuration
Field | Description | Required |
|---|---|---|
Enable Google Pay | When enabled, customers will be able to complete payment via Google Pay. | Optional |
Payment Sections | Where to display the Google Pay button (see detail below):
| Optional |
Button Colour | There are 2 options for how you can display the Google Pay button to your users depending on the colour scheme you have chosen for your website. | Optional |
Button Type | Depending on the nature of your business, you may want to change the text that is displayed on the Google Pay button displayed to the user. | Optional |
Button Height | Set the height in pixels of the Google Pay button - the width will always be set to 100%. | Optional |
Debug Mode | When enabled, a debug log will be created for each request to the API. | Optional |
Depending on how you have built your checkout flow within WooCommerce there are 3 places you can display the Google Pay button:
- Product: will be displayed below the Add to Cart button.
- Cart: will be displayed below the Proceed to Checkout button.
- Checkout: will be displayed as a payment option along with Pay by Card.
You can choose to support all or just some of the above options depending on your preference.
NoteIt is important to not that if your business process competitions, you cannot enable Google Pay.
Order status: configuration
View the WooCommerce managing orders documentation here.
Card payments
The Acquired.com for WooCommerce extension uses our Hosted Payment Page (HPP) solution in order to process payments securely.
Card details are entered directly into our environment so you comply with PCI DSS SAQ-A, while allowing you to fully customise the payment form.
When your account is first created we will load our default HPP template. We encourage you to update the form to meet your requirements and brand by changing the HTML & CSS.
Finding your MID
As part of the configuration process for Card Payments you will need to locate the 4 digit MID value which is located in the Hub.
Please follow these steps:
- From the sidebar, navigate to Settings > MIDs.
- Here you will see all available MIDs which can be used on your account. For card payments the bank name will be set to "Test Bank".
- Copy the 4 digit MID value in the Acquired Company MID ID field of the currency you want process and populate that value in your Acquired.com WooCommerce plugin MID field.
Styling the payment form
Once you have found your MID, you can update the styling of the Payment Form to match the branding of your website.
How you style it may depend on how you choose to Display the Payment Form, so please have a look at the available options before getting started. A default Hosted Payment Page (Form) will be automatically added to your account.
- Click on the 3 dots in the Action column of the MID and select Edit Service.
- Click on the Download button to get a copy of the default template.
- Open the index.html file in your favourite text editor and make any changes you’d like to styling, error messaging or field descriptions.
- When you are done editing, save the files, add any required images or font files to the folder and compress it into .zip format.
- Return to the Hub and select New Template.
- Click the Choose File button and locate the .zip folder on your machine to upload it.
- When the file name is displayed on the button, hit Submit to upload it to our system.
- In the test environment, the template will automatically be approved.
- In the live environment, the template will need to be reviewed by our team before being made available for use.
Good to knowIn index.html replace the {{cdn_url}} tag with https://qahpp.acquired.com/cdn to see how the payment page will display locally - just ensure you change it back before uploading it.
i-Frame popup
After clicking Place Order, a modal will be displayed overlaying the Checkout page for the user to enter their card details and complete their purchase.
Redirect
After clicking Place Order, the user will be redirected to our environment to enter their card details and complete their purchase. Once complete, they will be redirected back to your website and displayed with an order confirmation page.
Saved cards
Acquired.com are a fully compliant PCI DSS v3.2 service provider. We can securely store your sensitive cardholder data using our tokenisation solution.
We ensure this by giving your customer the option to store their card on the checkout by clicking Remember Card, allowing them to reuse this card upon their next payment.
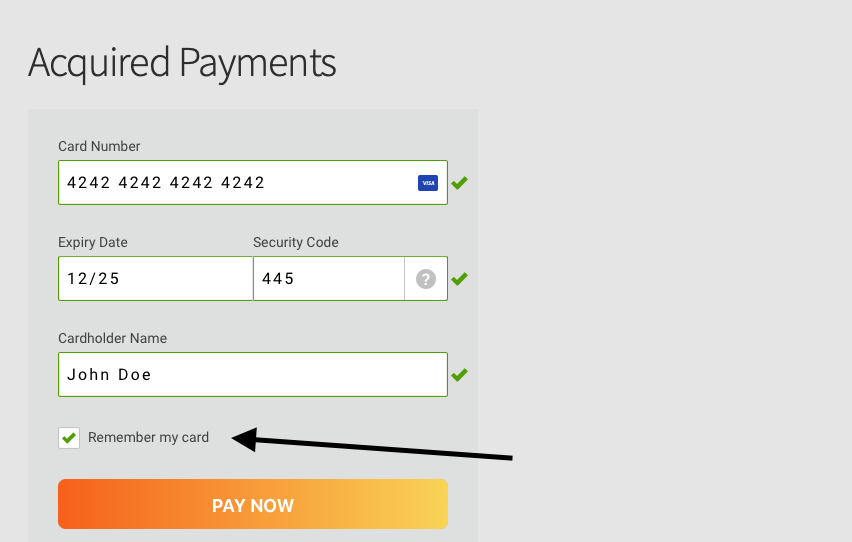
The tokenised (stored) card can then be used to process what we call “One Click Checkout”,where your customer will only be asked for their card cvv.

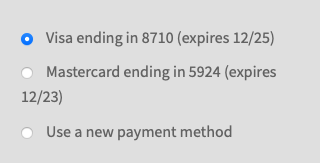
At the checkout, your customer will have the choice of paying with a previously stored card or use a new card.
If you decide to use this feature, you will need to upload a second HPP template in the Acquired.com dashboard and follow the same steps as above in the styling the payment form section.
Set up saved cards
- Download the default template.
- Scroll down in the index.html file until you find the following line of code and remove it.
<div class="input checkbox">
    <input type="checkbox" name="is_remember" id="is_remember" value="1">
    <div class="checkbox-toggle"><img src="{{cdn_url}}/images/icon-tick.svg"></div>
    <label for="is_remember">Remember my card</label>
</div>- When you are done editing, save the files and compress it into .zip format.
- Return to the Hub, click on the 3 dots in the Action column of the template table and click New Template. (Ideally name this new template, "Saved Cards Template", to distinguish which one it is.)
- Click the Choose File button and locate the .zip folder on your machine to upload it.
- When the file name is displayed on the button, hit Submit to upload it to our system.
- After you submit the file, click on the Back To List button so you will be taken back to the list of HPP templates you have stored against your Acquired.com merchant account.
- Make note of the Template ID displayed next to your Saved Cards Template, you will need it in the next steps.
- In your WooCommerce Admin Panel, navigate to Settings > Card Payments.
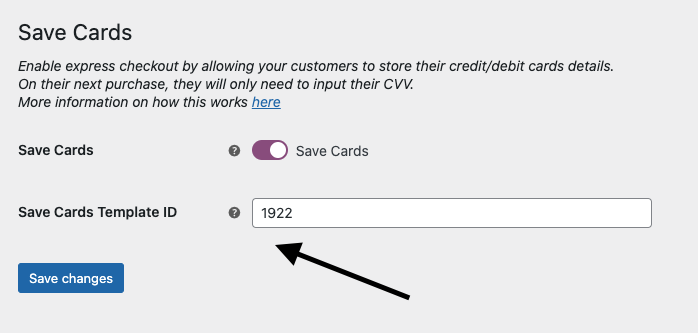
- Scroll down to the Saved Cards section and enable this feature by clicking on Save Cards.
- In the Save Cards Template ID field add the 4 digit Template ID you previously made note of and save the settings.
Apple Pay
The Acquired.com for WooCommerce extension makes use of the Apple Pay Web Registration API.
This means that you do not need to have an Apple Developer account or to manage your own certificates. To use Apple Pay, please make sure that both in the Sandbox and Live environments, all web pages hosting an Apple Pay button are HTTPS and your web server supports TLS 1.2.
The Apple Pay button will only display when using a supported version of Safari and the device has at least 1 acceptable payment method setup.
Registering your domain
This process is exactly the same in test and production environments.
- Log into the Hub.
- From the sidebar, navigate to Settings > Payment Methods > Apple Pay.
- In Web Domains click + Add Domain.
- Enter the domain (yourdomain.com) or subdomain (shop.subdomain.com) of your WooCommerce site where the Apple Pay button will be displayed.
- Download the verification file (apple-developer-merchantid-domain-association). The file name must not be changed or the registration will fail.
- If you have SFTP access to your site Create a new folder at root level name .well-known. Upload the verification file into the folder.
- If you do not have SFTP access, from the Wordpress sidebar, navigate to Plugins > Add New. In the search bar, in the top right corner, enter File Manager. Click on Install Now.
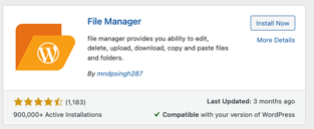
- Once the installation process is completed, click Activate.
- Once activated, click on WP File Manager.
- You will be presented with the folder structure of your Wordpress website.
- On the left hand side, right click on the top folder displayed. (In the screenshot it is called Wordpress, but may be named differently on your site.)
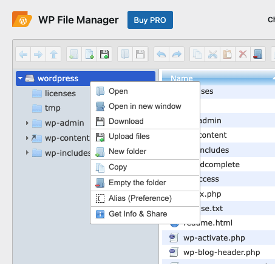
- Select New folder and name it .well-known.
- Double click on the .well-known folder and drop the verification file onto the screen from your computer.
- At this point, if you have been logged out of the Hub don’t worry you do not need to start the process again - just complete Steps 1-4 again.
- Click on Register Domain.
Testing Apple Pay
The process for testing Apple Pay in the test environment requires a number of steps, follow our Apple Pay test guide here.
NoteIn order to complete testing we recommend that you have a separate Apple device to your main device and to create a new Apple ID.
Google Pay
The Acquired.com for WooCommerce extension enables you to process Google Pay transactions. However, before going live, you will be required to register with Google via the Business Console so that they can approve your site for production use.
Please make sure that both in the test and live environments, all web pages hosting a Google Pay button are HTTPS and your web server supports TLS 1.2.
The Google Pay button will only display when using a supported version of Chrome and the device has at least 1 acceptable payment method setup.
Register with Google
Please follow the instructions on the Google Business Console to register your business for processing Google Pay transactions.
Testing Google Pay
Testing Google Pay requires a number of steps, follow our Google Pay testing guide for more information.
Updated 3 months ago